

Key takeaways
- Setup: Plug into a suitable 120-volt circuit, install solid wire for gas-shielded MIG or flux-core wire for gasless welding, connect the work clamp, and set polarity correctly.
- Wire compatibility: It accepts small solid wires for shielding-gas welding and flux-core wire for outdoor or windy conditions.
- Materials: Mild steel is its natural application. Stainless steel is possible with stainless wire and the correct shielding gas, but aluminum is not a practical beginner use without a more specialized system.
- Portability: At roughly 57 lb, it is movable but not a casual carry-around machine.
The best MIG welders for beginners are the Hobart Handler 140 for simple household projects, the Lincoln Electric Easy-MIG 180 for extra power and flexibility, and the Miller Multimatic 215 for buyers who want one machine that can grow beyond basic MIG welding.
A beginner-friendly welder should be judged on more than maximum amperage. Setup difficulty, usable low-amp control, wire compatibility, safety features, portability, duty cycle, and the thickness and type of metal it can weld will determine whether the machine is useful after the first project.
Our top picks
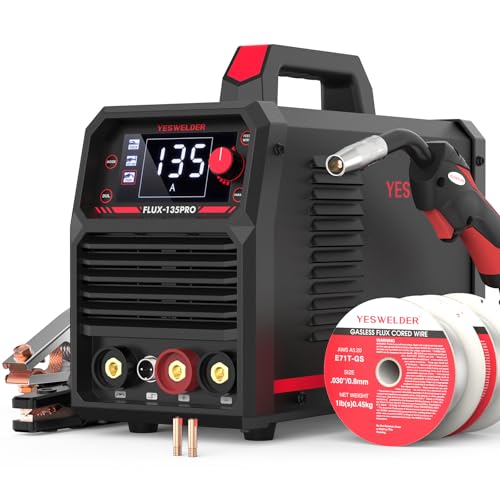


As an Amazon Associate we earn from qualifying purchases at no extra cost to you. Ratings are shown as listed on Amazon.
Best MIG welders for beginners at a glance
| Welder | Best for | Output range | Wire sizes | Approx. weight | Materials and practical thickness |
|---|---|---|---|---|---|
| Hobart Handler 140 | Home repairs and first-time users | 25–140 A | 0.023–0.030 in solid; 0.030–0.035 in flux-core | 57 lb | Mild steel and stainless steel; roughly 24-gauge to 1/4-in steel in suitable passes |
| Lincoln Electric Easy-MIG 180 | Beginners who need more capacity | 30–180 A | 0.025–0.035 in solid; 0.030–0.045 in flux-core | About 56 lb | Mild steel, stainless steel, and some aluminum with the appropriate spool-gun setup |
| Miller Multimatic 215 | One machine for MIG, flux-core, and occasional stick welding | 30–200 A MIG; up to 150 A stick | Commonly 0.023–0.035 in solid and flux-core | About 38 lb | Mild steel, stainless steel, aluminum with compatible equipment, and stick electrodes |
| Entry-level 120-V inverter MIG | Small spaces and light-duty repairs | 30–120 A | 0.023–0.030 in solid; 0.030–0.035 in flux-core | 20–35 lb | Thin mild steel, typically up to about 3/16 in with proper preparation |
Specifications vary by package, production revision, and input voltage. Treat the table as a buying guide rather than a substitute for the manual supplied with a particular unit.
Best overall for a first MIG welder: Hobart Handler 140
The Hobart Handler 140 is a strong choice when the priority is uncomplicated 120-volt operation. It suits brackets, small frames, equipment repairs, garden projects, and automotive sheet metal better than heavy structural work.
Its useful advantage is controllable low-amperage welding. Beginners often struggle more with burning through thin steel than with reaching a high maximum output. The Handler 140 uses a tapped voltage selector rather than infinitely adjustable inverter controls, but the settings are easy to understand and adequate for common mild-steel work.
- Setup: Plug into a suitable 120-volt circuit, install solid wire for gas-shielded MIG or flux-core wire for gasless welding, connect the work clamp, and set polarity correctly.
- Wire compatibility: It accepts small solid wires for shielding-gas welding and flux-core wire for outdoor or windy conditions.
- Materials: Mild steel is its natural application. Stainless steel is possible with stainless wire and the correct shielding gas, but aluminum is not a practical beginner use without a more specialized system.
- Portability: At roughly 57 lb, it is movable but not a casual carry-around machine.
Choose it if most projects will be indoors, the available power is 120 volts, and you value a well-supported, conventional design over advanced multi-process features.
Best for more power: Lincoln Electric Easy-MIG 180
The Lincoln Electric Easy-MIG 180 is the better fit for beginners who expect to weld thicker brackets, tubing, mower parts, small trailer components, or heavier shop projects. Its 180-amp class output provides more headroom than a basic 120-amp machine, although the machine still depends on the correct input supply and duty cycle.
A 180-amp rating does not mean it can weld unlimited thickness in one pass. Material preparation, joint design, preheating, wire diameter, and the machine’s duty cycle matter. For thick steel, a beveled joint and multiple passes are usually more reliable than simply turning the dial to maximum.
- Wire options: Small solid wire is suitable for thin steel; larger solid or flux-core wire can support heavier work.
- Gas flexibility: A mixed argon-carbon-dioxide gas is commonly used for mild steel with solid wire. Pure carbon dioxide can provide deeper penetration but generally produces more spatter.
- Material range: Mild steel and stainless steel are realistic applications. Aluminum requires a compatible spool gun, suitable aluminum wire, and the correct shielding gas; it should not be treated as an automatic capability.
- Portability: Around 56 lb makes it appropriate for a garage or workshop, but less convenient for ladder work or remote repairs.
This is the sensible choice when a beginner wants room to advance without immediately buying a 240-volt industrial machine.
Best upgrade choice: Miller Multimatic 215
The Miller Multimatic 215 costs more than a single-purpose beginner welder, but its value is flexibility. It can support MIG, flux-core, and stick welding, and compatible equipment can extend it toward aluminum work. That makes it attractive to a user who expects welding to become a regular hobby or workshop skill.
The machine’s lighter weight, around 38 lb, also makes it easier to move than many transformer-style 140- or 180-amp welders. Its interface is designed to reduce setup errors, though beginners still need to understand wire type, polarity, gas selection, and material thickness rather than relying entirely on automatic settings.
It is especially useful for someone who may work indoors one day and outdoors the next. Gas-shielded MIG is cleaner in a sheltered workspace, flux-core handles drafts better, and stick welding is useful for dirty or thicker steel. The trade-off is a higher purchase and consumable cost, plus more settings to learn.
Decision matrix: which type fits your situation?
| Your situation | Best choice | Why | What to avoid |
|---|---|---|---|
| First welder, occasional indoor repairs, 120-volt outlet | Hobart Handler 140 or similar 120-V unit | Simple controls and enough range for thin to medium mild steel | Paying for a multi-process machine you will not use |
| Weekly projects and thicker tubing | Lincoln Easy-MIG 180 or similar 180-A machine | More output headroom and broader wire choices | Expecting maximum amperage to replace joint preparation |
| Limited storage or frequent transport | Compact inverter MIG or Miller Multimatic 215 | Lower weight and easier movement | Large transformer machines without wheels or a cart |
| Want to learn several welding processes | Miller Multimatic 215 or another multi-process inverter | MIG, flux-core, and stick capability in one platform | A low-cost MIG-only machine with no expansion path |
| Outdoor work in wind | Flux-core-capable machine | Flux-core is less dependent on an undisturbed gas shield | Solid-wire MIG without wind protection |
How to set up a beginner MIG welder
1. Prepare the workspace
Remove flammable materials, provide ventilation, and place the welder on a stable surface. Keep a suitable fire extinguisher nearby. Welding fumes and ultraviolet radiation are hazards even during short jobs, so use a properly rated auto-darkening helmet, flame-resistant clothing, gloves, closed footwear, and eye protection.
2. Select wire and polarity
For clean indoor mild-steel work, solid ER70S-series wire with shielding gas is usually the easiest starting point. Use flux-core wire when gas is unavailable or outdoor airflow makes gas shielding unreliable. Follow the wire manufacturer’s polarity instructions; incorrect polarity can produce excessive spatter, poor penetration, and an unstable arc.
3. Match the wire to the metal
For thin steel, 0.023- or 0.025-inch wire provides finer control. For heavier steel, 0.030- or 0.035-inch wire can deposit metal faster, but it needs more current. Stainless wire requires compatible shielding gas and careful cleaning. Aluminum normally needs a spool gun or push-pull arrangement because soft aluminum wire can buckle in a long standard gun liner.
4. Set gas flow and machine controls
A typical indoor gas-shielded MIG setup uses approximately 20–30 cubic feet per hour, adjusted for the nozzle, workspace, and drafts. Set voltage and wire-feed speed using the machine chart, then test on a piece of the same thickness. A stable crackling arc, modest spatter, and a smooth bead profile are better targets than a particular dial position.
5. Clean, tack, weld, and inspect
Remove paint, rust, oil, and mill scale near the joint. Tack the pieces first so heat does not pull the assembly out of alignment. Make short practice beads before the final weld. Inspect for visible cracks, lack of fusion, excessive undercut, pinholes, and incomplete coverage. A neat appearance alone does not prove a weld is strong.
Ownership costs and maintenance beginners often miss
The welder is only part of the budget. A basic solid-wire setup also needs a gas cylinder, regulator, hose, contact tips, nozzles, wire, gloves, a helmet, and a way to clean the joint. Contact tips and nozzles are wear items; they become damaged by spatter or an incorrect tip size. Liners collect dust and metal debris, especially when the wire spool is dirty or the gun is bent sharply.
For a simple cost estimate, suppose a beginner uses 0.5 lb of wire per project. A 10-lb spool would provide approximately 20 projects before allowing for wasted wire and discarded starts. If each project also uses a small amount of shielding gas and one or two contact tips over time, consumables can add several dollars per use even when the machine itself has already been purchased. Flux-core avoids cylinder rental or refill costs but generally creates more smoke, slag, and cleanup.
- Keep the wire dry and covered; damp flux-core wire can weld poorly.
- Trim the wire cleanly and keep the gun liner free of sharp bends.
- Brush slag from flux-core welds before adding another pass.
- Do not exceed the duty cycle; let the machine cool when its indicator requires it.
- Check the work clamp connection before increasing amperage.
- Never weld painted, galvanized, sealed, or unknown containers without proper professional assessment and preparation.
Final buying advice
For the lowest-friction start, buy a 120-volt machine with solid-wire and flux-core compatibility, a clear chart, replaceable contact tips, and readily available consumables. Choose the Hobart Handler 140 for occasional light and medium work, the Lincoln Easy-MIG 180 for greater steel capacity, or the Miller Multimatic 215 when portability and multiple welding processes justify the extra cost. Whichever model you choose, the best beginner setup is the one that matches your available electrical supply, working space, material thickness, and willingness to maintain the gun and consumables.

Write Your Review
No reviews yet. Be the first to share your experience!